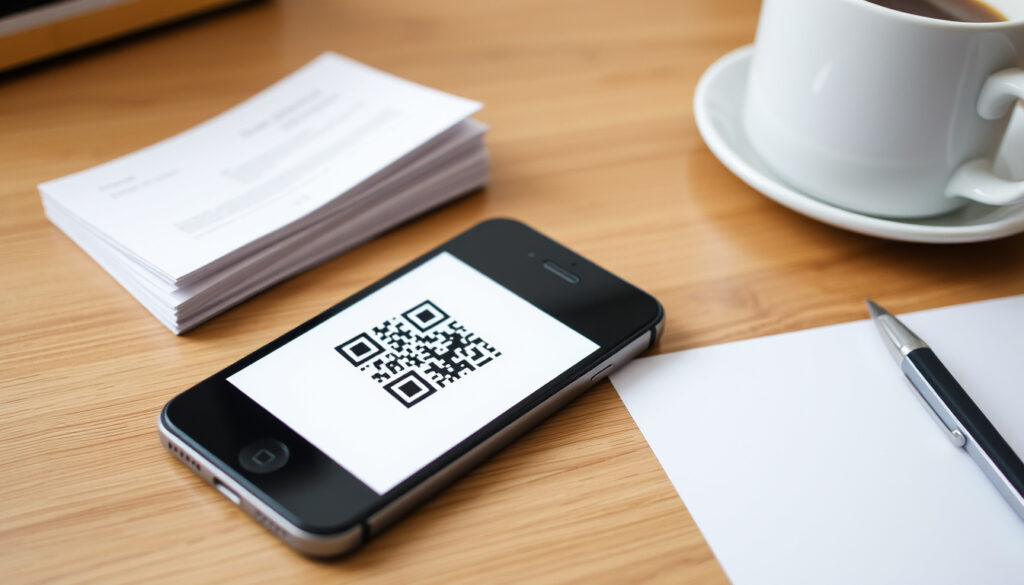
How to Scan on iPhone: Documents, QR Codes & More Guide
Anyone who’s ever needed to scan a document in a hurry knows the panic of looking for a scanner. The iPhone has had two built‑in scanners since iOS 11: one in Notes and another in Files.
Built-in scanning apps: 2 (Notes and Files) ·
Maximum pages per scan: Unlimited (continuous capture) ·
Output formats: PDF (Files) or image (Notes) ·
QR code scanning: Automatic in Camera app since iOS 11 ·
iOS versions supported: iOS 11 and later
Quick snapshot
- Built-in on every iPhone with iOS 11+ (Apple Support)
- Scans to image within note (Apple Support)
- Supports multiple pages (Apple Support)
- No PDF conversion (Apple Support)
- Built-in document scanner (Apple Support)
- Scans to PDF (Apple Support)
- Can save to any folder or cloud service (Apple Support)
- Best for professional use (Apple Support)
- Automatic QR detection in Camera app (Apple (maker of iPhone))
- Works on iPhone 7 and later (Apple (maker of iPhone))
- Tap notification to open link (Apple (maker of iPhone))
- No third-party app needed (Apple (maker of iPhone))
- Dedicated scanner in Control Center (Apple Support)
- Scans QR codes, barcodes, product codes (Apple Support)
- Added via Settings > Control Center (Apple Support)
- Works on iOS 11 and later (Apple Support)
| Built-in scanning apps | Value |
|---|---|
| Built-in scanning apps | 2 (Notes and Files) |
| Max pages per scan | Unlimited (continuous capture) |
| Output formats | PDF (Files) or image (Notes) |
| QR code scanning | Automatic in Camera app since iOS 11 |
| iOS versions supported | iOS 11 and later |
How do I scan using my iPhone?
What you need
Any iPhone running iOS 11 or later can scan documents without extra apps. The two primary scanning tools live inside the Notes app and the Files app. Apple confirmed that both are available on all compatible iPhones (Apple Support (official iPhone documentation)). For QR codes, the Camera app handles detection automatically on iPhone 7 and later models running iOS 11 or later (Apple (maker of iPhone)).
Overview of built-in scanning methods
- Notes app – Scans documents and saves them as images inside a note. You can sign, markup, and share directly.
- Files app – Scans documents and saves them as PDFs in any folder, including iCloud Drive. Better for archiving.
- Camera app – Detects QR codes automatically; no scanning menu needed.
- Code Scanner – A dedicated scanner in Control Center for QR codes, barcodes, labels, and product codes (Apple Support (official iPhone documentation)).
Where is the scanner on my iPhone?
Finding the scan option in Notes
- Open or create a new note.
- Tap the Attachment button (camera icon) above the keyboard.
- Tap Scan Documents – the camera viewfinder appears.
Apple’s official documentation confirms this flow (Apple Support (official iPhone documentation)).
Accessing scan in Files
- Open the Files app.
- Navigate to any folder or the Browse tab.
- Tap the More button (three dots in a circle) and select Scan Documents.
QR code scanner in Camera app
No menu diving needed. Point your iPhone camera at any QR code. A notification banner appears at the top of the screen when the code is recognized (Apple (maker of iPhone)). Tap it to open the link.
The Camera app only works for QR codes. If you need to scan a document or barcode, you still need the document scanners in Notes, Files, or the Code Scanner in Control Center.
How do I scan documents on my iPhone without third-party apps?
Scanning with Notes (step-by-step)
- Open Notes and tap New Note or open an existing one.
- Tap the Attachment button, then Scan Documents.
- Place your document in view. If Auto mode is on, the iPhone captures the scan automatically when the document is in frame (Apple Support (official iPhone documentation)).
- If you need manual control, tap the shutter button or press a Volume button.
- After capture, drag the corners to adjust boundaries, then tap Keep Scan.
- Tap Save to store the scanned pages inside the note.
Scanning with Files (step-by-step)
- Open the Files app and navigate to the folder where you want the PDF saved.
- Tap the More button and choose Scan Documents.
- Capture your document – the auto‑capture and manual adjustment work the same way as in Notes.
- Tap Save to create a PDF in that location (Apple Support (official iPhone documentation)).
Differences between Notes and Files scans
The pattern: Notes favors speed, Files favors structure.
| Feature | Notes | Files |
|---|---|---|
| Output format | Image embedded in note | PDF saved to folder |
| Multiple pages | Yes, as separate images | Yes, as a single PDF |
| Save location | Inside the note | Any folder (including iCloud Drive) |
| Sign documents | Yes, with Markup tools | After saving, open PDF to sign |
| Best use case | Quick receipts, notes | Contracts, official documents |
How do I scan a QR code on my iPhone?
Using the Camera app
Open the Camera app and point it at the QR code. The camera automatically recognizes the code and a notification appears (Apple (maker of iPhone)). Tap the notification to open the link or perform the action. This works on iPhone 7 and later models running iOS 11 or later.
Scanning QR codes from Control Center
Apple’s Code Scanner is a dedicated tool you can add to Control Center (Apple Support (official iPhone documentation)). To add it: go to Settings > Control Center, tap the green + next to Code Scanner. Once added, open Control Center and tap the Code Scanner icon to scan QR codes, barcodes, labels, and product codes.
Troubleshooting QR scan issues
- Make sure QR code detection is on: Go to Settings > Camera and toggle Scan QR Codes on.
- Clean the lens: A smudged lens can prevent recognition.
- Good lighting: Shadows or glare can interfere.
- Hold steady: Shaky hands make it harder for the camera to focus.
QR codes are everywhere – from restaurant menus to boarding passes. Apple’s built‑in solution means you never need to download a separate scanner app, saving storage and avoiding potential privacy risks from third‑party tools.
How do I scan and send documents on my iPhone?
Sharing scanned documents from Notes
After scanning in Notes, tap the Share icon (square with arrow) in the note. You can send the scanned pages via email, Messages, AirDrop, or any app that supports sharing images. The Adobe Acrobat blog notes that “the scanned document is saved as a PDF in Files or as an image in Notes” when using the native iPhone scanner (Adobe Acrobat blog (document management solutions)).
Exporting from Files
In Files, open the folder containing your scanned PDF, tap Select, choose the file, and tap the Share icon. You can email the PDF, AirDrop it to a Mac, or upload it to cloud services.
Using the Share sheet
Both Notes and Files use the system‑wide Share sheet, so you can send scans to any compatible app: Mail, Messages, Google Drive, Dropbox, Slack, and more. For Mac users, Continuity Camera lets you insert a scan directly from your iPhone into a Mac app without saving anything first – just right‑click and select “Insert from iPhone.”
Step-by-step guide to scanning on iPhone
- Open the scanner – In Notes, tap the camera icon > Scan Documents. In Files, tap More > Scan Documents.
- Position the document – Hold your iPhone steady above the document. Auto mode captures automatically when the frame is square.
- Adjust boundaries – Drag the corners of the captured image to fit the document edges. Tap Keep Scan when satisfied.
- Add more pages – Tap the shutter again to scan additional pages. Each page is added to the same document.
- Save – In Notes, tap Save to embed the scans. In Files, tap Save to create a PDF in the chosen folder.
- Share or sign – After saving, tap the Share icon to send the scan. Use Markup tools to sign or annotate in Notes.
For QR code scanning, the process is even simpler: open Camera, point at the code, tap the notification.
Apple has turned a one‑time purchase (a dedicated scanner) into a free, always‑available feature. The trade‑off: output is limited to images and PDFs – there’s no built‑in OCR for searchable text. If you need OCR, you’ll still need a third‑party app.
What is confirmed and what remains unclear about iPhone scanning
Confirmed facts
- The Notes app has a Scan Documents option since iOS 11 (Apple Support).
- The Files app gained document scanning in iOS 13 (Apple Support).
- Camera app scans QR codes automatically on iPhone 7 and later with iOS 11+ (Apple).
What’s unclear
- Exact OCR capabilities of Notes vs Files scans – Apple does not specify whether text search works in the scanned image within Notes.
- Whether Continuity Camera works with all Mac apps – Apple states it requires the same Apple ID and Wi‑Fi/Bluetooth, but some third‑party apps may not support the feature.
- Scan documents directly into Mac apps – requires same Apple ID and Wi‑Fi/Bluetooth, but compatibility with all Mac apps is unverified.
- Mac displays insert menu option – confirmed to work with supported apps, but coverage across third‑party apps is not fully documented.
- Seamless cross-device workflow – works with Apple’s own apps, but third‑party support remains unconfirmed.
“You can scan documents using the Notes app or the Files app. The scanned document is saved as a PDF in Files or as an image in Notes.”
— Apple Support (Apple Support (official iPhone documentation))
“To scan using the native iPhone scanner, open a note, tap Camera, then Scan Documents. Capture your document as you would a photo.”
— Adobe Acrobat blog (Adobe Acrobat blog (document management solutions))
For the average iPhone user, the built‑in scanning tools cover the vast majority of everyday needs – from capturing a boarding pass to saving a signed lease. The only real gap is searchable text, but for most file‑and‑forget scenarios, Notes and Files deliver everything a dedicated scanner app would. For anyone in the Apple ecosystem, the choice is clear: use Notes for speed, Files for PDFs, and Camera for QR codes – no downloads needed.
If you’re new to the built-in tools, this guide to iPhone scanning covers the same native methods for documents and QR codes in more detail.
Frequently asked questions
Can I scan multiple pages into a single document on iPhone?
Yes. In both Notes and Files, after scanning the first page, tap the shutter button again to add more pages. All pages are saved together – as separate images in Notes or as a multi‑page PDF in Files.
Does the iPhone Notes app create PDFs when scanning?
No, the Notes app saves scanned pages as images embedded in the note. To get a PDF, use the Files app scanner, which outputs to PDF.
How do I scan a document that is larger than the camera frame?
The iPhone scanner uses automatic cropping. Simply move the camera over the document – it will stitch the parts together as long as you stay within the frame. The auto‑capture mode handles this smoothly.
Can I search text inside scanned documents on iPhone?
Not directly with the built‑in scanner. The scanned image doesn’t include searchable text. For OCR (optical character recognition), you would need a third‑party app like Adobe Scan or Microsoft Lens.
Why isn’t my iPhone scanning QR codes automatically?
Check your camera settings: go to Settings > Camera and make sure Scan QR Codes is turned on. Also clean the lens and ensure good lighting.
How do I save a scanned document to iCloud Drive?
Use the Files app scanner. After scanning, choose a folder that is synced with iCloud Drive (e.g., “iCloud Drive” folder itself or any subfolder). The PDF will automatically upload to iCloud.
Related reading
More related posts
 The Gilded Age Season 1: Where to Watch, Cast & Episodes
 Convert PDF to Word – Best Free Tools Guide
 Love Island Games Season 2: Premiere, Cast & Couples Guide
 How Many Stamps Do I Need for An Post in Ireland?
 Amazon Locker Near Me: Find Free Pickup & Stop Porch Theft
 Detroit Pistons vs Knicks Match Player Stats & Key Performers
 Family Business New Orleans: Season 2, Cast & Episodes
 Thank You So Much: Alternatives & Proper Usage Guide